

QR & Barcode Scanner

Description of QR & Barcode Scanner
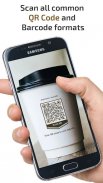
QR & Barcode Scanner is an essential app for every Android device. It detects, magnifies, and recognizes barcodes from a distance, scan a very small barcode in the same way.
Simply point QR & Barcode Scanner to QR code or barcode you want to scan and you will get the result automatically.
It is a handy tool for scanning all common formats: QR Code, Data Matrix, PDF417, Aztec, EAN-8, EAN-13, UPC-A, UPC-E, Codabar, Code 39, Code 93, Code 128, and ITF.
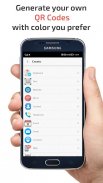
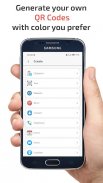
You can also use QR & Barcode Scanner to generate and share your own QR codes.
🔹 Features of QR & Barcode Scanner:
► Scan
✓ Quickly scan different QR code formats
✓ Automatically detects, magnifies, and recognise barcodes from a distance
✓ Auto Zoom option while scanning
✓ QR & Barcode Scanner scans, parses, and generates major 1D and 2D barcodes
✓ Ability to scan a small QR Code
✓ Turn on the flashlight for scanning in the dark
► Multiscan
✓ Scan multiple QR codes at once with QR & Barcode Scanner
► Scan from picture
✓ Scan QR from your gallery
► Common formats
✓ Scan all common formats: QR, Aztec, Data Matrix, EAN, ITF, CODEBAR and more
► QR Code generator
✓ Create your own QR codes
✓ Set custom QR color and background
✓ Create unlimited number of QR codes
✓ Export and share QR codes
► Scan History
✓ Scanned QR codes are saved in Scan history
With QR & Barcode Scanner you can easily scan or generate all common QR Code and Barcode formats.
USAGE INSTRUCTIONS:
Scanning Using Camera: Place the camera in front of the QR Code or barcode that you want to scan. The scan results will be shown automatically.
Scanning Using Existing Image from Phone Gallery: Select "IMPORT" option on the main screen.
Creating and Generating QR Codes(or Barcodes)
- Select "Create" option from the top of the app.
- Select one of the options: Clipboard (create from Copied content), Text, Website, Wifi, Contact info, Email, Event, Telephone, SMS.
- Fill the relevant details and click the buttom GENERATE.
Scan/Create History: You can view all the past scanned/created/generated QR code and barcodes using the History option.


